At the National Wedding Show in February 2011, we came across The Wedding Ring Workshop which offers the opportunity to have a go at making your own rings. So, on Saturday 19th May, Lindsay and I made our own wedding rings! It was quite an experience as neither of us had any real idea about how rings are made. I had thought that you melted the metal into a ring-shaped mould and went from there. I can say that it is a very different process!
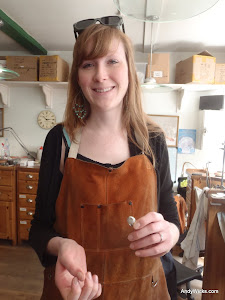
The day started with us meeting discussing our requirements and thoughts with Rob, our jeweller for the day, over a cup of tea. With our rings designed everything organised, it was off to work. We started off by melting 29g of Platinum from pellet form into a nugget.

29 grams of Platinum pellets
Lindsay with the nugget
Working with the cold nugget, we put it through rollers to change into a square-profile bar.

Rolling the nugget
After every dozen or so passes through the rollers we had to re-heat the bar and cool it again to prevent it from cracking. We had to be careful not to melt the bar back into a nugget, as we would have to have started all over again!

Re-heating the bar
The more times the bar went through the rollers, the longer the bar became

Getting longer …

… and longer …
Once the bar had reached the required length it was time to cut it into two peices. Each part would then be formed into an individual ring.

Cutting the bar
The piece which was to form Lindsay’s ring was then put through the rollers to give it a smaller profile, as Lindsay’s ring was going to be narrower than mine.

Lindsay’s bar at the top and mine below
Now that the bars were approximately the correct size it was time to make them look more like rings. This not only involved manually bending the bars into a round shape, but also required us to make them the correct size!

Shaping the ring
With the bars into an approximately round shape, Rob welded the bars to form a closed ring. Lindsay and I had to roll a cut-off piece of bar into something that resembled tin foil, which Rob then used to weld with to ensure that the join would not be noticeable.

The circular bars with the ‘tin foil’ prior to welding

Welding the ring closed
Our previous attempts at making a ring shape, before welding, had left us with approximately round shapes. The next challenge was to make them perfectly round. This was done, as all fine work should be, with a hammer!

Making the rings round
Now that all of the dangerous work had be completed, and no more fire was required to make our rings, it was time to celebrate with a glass of fizz.

A well-earned glass of fizz
Up next was where the fine detailed work really commenced. We had to file the rings down into the correct profiles from the current rectangular profile. My ring was to be a slight-court shape and Lindsay’s was to be almost round. Filing the rings required the use of different grade and shape files to ensure that we were working towards the desired shape.

Filing the ring into the correct profile
After we had finished filing the rings to the correct profile, it was time to use a very fine sandpaper to remove all of the scratches from them. This was a slow and steady process, as we had to be careful not to sand too much and change the profile we had worked so hard to achieve. We then took them to a polishing machine for a final polish before our day concluded.

Sanding the scratches out of the rings
The rings are now sent off for hallmarking, before being returned to the workshop for a final polish and to await collection. We both had an amazing day, and were ecstatic with the results. Despite having been through the entire process, we were still disbelieving that what we were now holding was just pellets of Platinum a mere 5 hours earlier. The final articles will remain secret until the big day, which is now less than 3 months away!
If you are looking for something that little bit more special in a ring, we can’t recommend the The Wedding Ring Workshop enough. They are really friendly, the experience is amazing and we ended the day holding a pair of unique rings which we had not only designed, but also made!
[pe2-gallery album=”http://picasaweb.google.com/data/feed/base/user/109349814061626119021/albumid/5744678657391523473?alt=rss&hl=en_US&kind=photo” ]